Showing posts with label Home Improvement. Show all posts

Sunday, January 22, 2012

A Weekend of Pinspiration - Part 3 - Painted Wallpaper

After a very long delay, here is the follow-up to Part I and Part II of my Pinterest weekend with Lisa.  I'll explain the reason for the delay, so just keep reading!

For our largest project of the weekend, Lisa and I decided we wanted to tackle this:
Stenciled Wallpaper


Phase I of our dining room makeover occured when Tim's mom came to visit.  We repainted the dining room a slightly lighter blue and I had a secret plan that I wanted to do the wallpaper stencil.  After a little bit of searching on Pinterest, I knew I'd found the one I wanted.  But, when we printed out the stencil from the website, which I linked below, it was TINY and we thought that much pattern would be too busy all over the walls.  So, we headed to Office Max and had them blow up the stencil (honestly it took a few guesses and we had them print a couple).  The total cost for this was a little more than I was expecting (about $10), but still not too bad! 


See link to template here

We traced the template onto some sturdy cardboard so it would hold up while we traced it - honestly the hardest part of this entire project was probably cutting through the cardboard.


We also wanted to make sure that the design was spaced semi-evenly on the wall.  We figured out that the space we were covering was 73" tall and each design was 20.5" tall.  Because we wanted an even amount of overhang on each side of the design, I figured out how many full designs would fit and divided the remining amount by 2 - the magic number was 5.75" of overlap on each end.  We ended up folding our paper template so that there was 5.75" and used this for the partial designs. 


I may be an accountant, but I think I'm crippled by always using a calculator - ignore the erase marks, the "borrowing" from the other digits and my carrying of the 1  :)


I decided to follow the advice of the woman whose pin I copied above and instead of using white paint, we used the leftover blue wall color paint I had and mixed in some white (it came out a more light grey/blue).  I like this better because there isn't too stark of a contrast.


Once we had our paint ready, it was just tracing and painting.  Luckily, my dining room has wainscoating and is open to the living room so we only had to do the top half of 3 walls (really only 2 since one of them has a large window).  I tackled the tracing while Lisa did the painting.  The wall is by no means perfect and we didn't use a level or really measure it out - just eyeballed it.  It helped that we tried to make the space we painted the width of the paintbrush so Lisa only had to do one stroke and it kept the painting uniform.


Design traced in pencil

 We just contined all the way around the room:


It really didn't take a lot of time when the two of us were working on it - maybe 6 hours total.  So, now the reason for the delay...

We had originally traced the outline of the stencil in pencil.  We did a test once the paint had dried to make sure the pencil came off, and it worked great!  Well.....turns out, if you let the pencil sit for a few hours or if you paint on TOP of the pencil, you can still see it underneath the lighter color and it WILL NOT ERASE!  Also, when I tried erasing over the darker color, the pencil would smear and leave dark streaks.  So, word to the wise - use a VERY light touch when tracing and try to keep your lighter paint color inside the paint lines. I ended up having to do a second coat of the entire lighter color and then touch up a good amount of the darker color (don't forget to save a little bit before you pour the white in - you'll need it!)  It took me much longer to do this by myself, hence the reason for no update post. 

But, I'm happy to report - I'm all finished!!  All in all, I'm pleased as punch with how it came out!  Yes, I said "pleased as punch" - I also knit and love to go to the library - I'm 90 years old, don't judge.  Especially, since the only cost was about $20 for the template and a quart of white paint!  I think it was totally worth it, but don't take my word for it - a picture (or three) is worth a thousand words:


I also got some new curtains and a new rod - the previous one was just too skinny and not substantial enough.  I was proud of myself for being able to mix patterns - normally I'm a scaredy cat about about that kind of thing, so if you hate it - just keep to yourself!


Now, just need to figure out what to put on that blank wall (any ideas?!), add a few accessories and this room should be almost complete!

Sunday, November 27, 2011

A weekend of Pinspiration - Part 2 - Menu Board

I hope everyone had a wonderful Thanksgiving holiday - we're just getting back from Memphis with my mom's side of the family - great weekend of food, family and fun!  Pics to come soon!

But first, back to my weekend of Pinspiration - I've been dying to come up with a solution for my weekly menu planning.  If you know me even slightly, you know I'm pretty obsessed with spreadsheets.  Usually, I try and make a menu plan every Sunday - I do this out of sheer necessity (so don't be too impressed) because I'm not creative enough to come up with something on the spur of the moment with ingredients I have - if I haven't planned ahead, it probably means we're having a Moe's night  :)  This has also been pretty essential in getting healthy - I find that if I plan in advance, its much easier to eat healthy dinners.  So, normally, my spreadsheet would be fine.  The problem was that we buy a lot of stuff frozen so we can buy in bulk and I'd forget that morning to set out food to defrost.  Sometimes, a meal also requires that we grill extra items on one night so I have it for later.  Well, all that planning goes out the window unless I remember to do the prep.  So, a menu board it was!  And I decided I needed a giant board right by the door to my garage, so there really would be no way to forget.  I was loosely inspired by several Pinterest pins (including the one hyperlinked below), but really Lisa and I came up with this one all on our own!

Chalkboard menu planner
So, Friday morning, bright and early, we headed to Lowe's (our first of 4 trips) and Hobby Lobby to get supplies.


We started with one of the unfinished frames from Hobby Lobby - they were 50% off and this one ended up being about $40.  We thought about trying to use trim pieces from the hardware store, but couldn't figure out how to make it flush (since a frame already has routed edges to drop in a piece of glass), so I decided this frame was worth the extra expense.  We ended up picking the frame we liked the best and didn't worry about the color - spray paint is cheap! 

Step 1:  Spray paint unfinished frame with white spray paint


Finished frame
We also bought a sheet of plywood from Lowe's and had them cut it to fit exactly into our frame.  The whole sheet was about $10 and we used less than 1/2 - we saved a few smaller pieces and gave one larger piece we couldn't fit in the car to a stranger  :) 


To create our chalkboard, we first tried chalkboard spraypaint that we found at Hobby Lobby - total fail, I wouldn't recommend.  Granted, I probably didn't give it a fair shot - after about a 1/2 a coat, I waived the white flag - it was getting drip spots, the coverage was very uneven (didn't cover the grain of the wood) and it looked like it was going to need a TON of paint.  I think this may have been created for use on a slightly smaller projects - not 40x30 pieces of plywood!  Either that, or perhaps its user error.

So next, we turned to chalkboard paint that we applied with a roller.

Step 2:  Paint plywood with chalkboard paint

See the difference?  We did end up doing a 2nd coat of the paint as well, just in case.
Lastly, we had to figure out a way to attach the plywood to the frame.  We wanted to make sure the plywood was held very tightly in place so it wouldn't wiggle when I tried to write on it.  The plywood wasn't quite as thick as the opening for the frame, so we had to get creative.  We ended up buying these metal thingys (which is the technical term - I checked) and screwed them to the frame so it would hold it.  Lisa slightly bent them so they would have more pressure on the plywood.  Apparently she was a little too strong for her own good - she ended up breaking the metal once, so take caution!
Step 3:  Attach plywood to frame with metal fasteners

Close up shot of our hardware
Then - our menu board was ready to hang!  We used picture hanging wire on the back and screwed two screws into the wall.  We added some chipboard letters we painted black to spell out "Menu" and....Ta-Dah!

One stipulation I had was that I did NOT want to use regular chalk to write on the board - I hate how dusty it gets and I knew I wouldn't want to deal with that.  Lisa recommended these:

Crayola Dry Erase Crayons
They write just like crayons and they do erase off my chalkboard as long as you use a little water.  I'm also thinking about getting a chalkboard marker, but we'll see.  Tim and I used our board for the first time last week (even though it was a short week b/c of Thanksgiving break and meals were basically just a hodge podge) - it was a great reminder to me that I needed to make the pumpkin pie cheesecake swirl dessert I brought to our family meal. 


I'm looking forward to meal planning today just so I can write it on my board!

Wednesday, November 23, 2011

A weekend of Pinspiration - Part 1 - Painted Curtains

When Lisa comes into town, I can always count on her to do a little home improvement with me.  Last year, she helped me tackle several projects in my living room to make it look a little bit more completed including adding shelving/accesories and a picture wall.


Picture Wall - Lisa's '10 visit

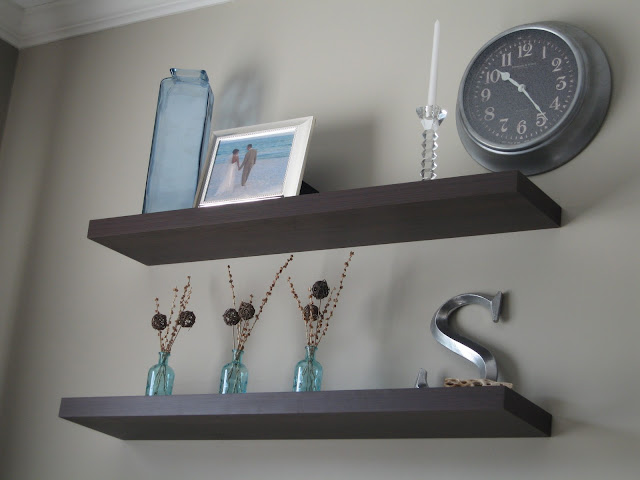
Floating shelves & accessories - Lisa's '10 visit

This time when she came, I was prepared with a handy list of inspiration from my favorite website, Pinterest.  One of the projects I really wanted to tackle included the following:

Painted curtains

I saw these curtains and couldn't believe when I clicked on the link that she had actually PAINTED them.  In her blog, she uses some cheaper Ikea curtains, but I actually got some velvet white drapes from Lowe's (would have been even cheaper if I had found some good drop cloth - I've seen some great curtains made out of drop cloth) but I wanted them to be a little thicker and make sure they blocked most of the light.  After a few quick measurements, we decided we wanted 10" stripes, knowing that the bottom stripe would be about an 1" or 2" wider (which was okay with me).  We moved the dining room furniture, laid out a drop cloth, and started measuring!

Blank canvas!
I didn't feel like marking any measurements on the curtains because I was lazy wasn't sure how it was going to come off.  So instead, we marked 10" with a tiny piece of tape on each side and in the middle, then laid one long strip across so it lined up with all three.   

Marking our tape pieces
Taping was the only challenging part of this project - we had to keep remembering which part would be painted and make sure that the tape was on the OUTSIDE of that line.  Then, when you measure the next one, make sure you measure from your true line (which is sometimes the top of the tape and sometimes the bottom of the tape depending on whether its a painted stripe or not).  We ended up putting a smaller piece of tape to remind us which stripes we did NOT have to paint - see how they look smaller because the tape is on the inside of each line. 


From there, we just rolled on my wall color with a normal paint roller - be warned, this soaks up a LOT of paint.  We only bought one quart and definitely had to squeeze out the last few stripes, even though there were only about 8 stripes total.  I probably would have bought a gallon next time to be safe.  Plus, I don't think it would hurt to do 2 coats, but more on that later.

Remove the tape while still wet - no bleeding!
While we were at it, we bought some oil rubbed bronze spray paint and spray painted my curtain hardware.  Look how pretty it looks...

Coolest spray paint ever...I see why people are obsessed
And now, the finished product...


Not too shabby!  Word to the wise on this one though - I didn't read all the way through the blogger's post.  When the paint started to dry, there were some spots that soaked in a little more than other and Lisa & I went back and touched them up.  Those touch-ups didn't dry uniformly with the rolled on paint, so I'd caution against doing this - probably just roll on a second coat.  A few people have asked if they're "crunchy" - and since these are velvet, they weren't exactly the blowing in the wind to begin with.  If these are going in a high traffic area or you have kids that might play with them, you might be disappointed, but for my purposes I thought they're just fine.  The dark color actually looks a little like suede in person.
Hope you're moved to tackle some Pinterest projects soon...stay tuned for the other 2 projects we tackled this weekend!

Saturday, September 17, 2011

Labor Day Weekend

I'm a few week behind in posting, but we've been pretty busy!  Tim's mom, Jody kept with our Labor day tradition and came to visit (I think this is the 3rd year in a row?) - we had a wonderful weekend full of food, shopping, friends, football, and a little bit of home improvement for good measure!  On Friday night, Tim grilled pork chops for dinner and then we all watched The Adjustment Bureau with Matt Damon and Emily Blunt which was pretty good.  Saturday was a big day - the first Nebraska game and the first Auburn game!!!!  We decided to order Saw's Barbecue which we had never tried before but had heard great things about.  I'm not a huge barbecue fan normally (I don't like the sauce - just eat it without), but the mac & cheese was delicious!  We also made a few appetizers (the jalapeno poppers we promised we'd make again, caprese salad, a veggie tray which a great cream cheese dip that Jody made, and popcorn with peanuts and m&m's).  Justin and Nichole joined us for the end of the Auburn game and all of the Nebraska game.  Luckily, both teams ended up winning their games....even if Auburn's win was only by the skin of their teeth!!

Jody & Tim watching the games

Nichole & Justin rooting for the huskers (I'm outnumbered!)

Jody, Tim & I

A few munchies
Now, if you have been reading this blog for any amount of time, you know my fondness for dessert, so I can't let an opportunity pass without trying a recipe I found on Pinterest!  The strawberry cake I made for 4th of July which was very delicious was also inspired by Pinterest, so I thought I'd give another one a shot.  This time, Jody & I went with Chocolate Chip Cookie Dough Cheesecake Bars.  YUUUMMMMMMMMM.  They were as good as the name sounds!  I would recommend!  Plus, I liked that they made a smaller batch - we didn't have TOO much leftover (not that I really mind eating the dessert the rest of the week, but since Tim's not a big sweets person I end up eating way more than I should).

Chocolate Chip Cookie Dough Cheesecake Bars

Yes, I took this picture myself!  I think I'm getting better with my camera!
On Sunday, we went to church and came back and had leftover barbecue for lunch.  That afternoon, we headed out to the Grand River outlet mall for a little holiday weekend shopping!  We found some good deals for Tim on some dress shirts and ties and Jody found a few things, but I didn't have a ton of luck - my favorite store there is the Banana outlet, but they were a bit in between seasons, so I didn't bite on anything.  That night, we went to one of our favorite Mexican places - Iguana Grill.

On Monday, it POURED rain -- we laid low Monday morning and went to Lowe's to get some new paint for our dining room.  We painted it blue when we first moved in three years ago and while I still really love blue, the color ended up a little darker than I intended.  We picked a little lighter blue and painted it in an afternoon.  It was a good thing it didn't end up taking too long because we lost power for a bit that evening (lost it again in the middle of the night and had to get ready in the dark the next morning - boo!) 


Work flies when you have help!

Best comparison pic of the two colors


Okay, okay - so it doesn't look that different...It definitely brings more light into the room and we like it!  I have a few more ideas up my sleeve for sprucing it up when Lisa comes into town in November :)

Tim took Jody to the airport on Tuesday morning - the weekend went way too fast!  We're so glad you came, Jody!

And now, a small sneak peek of where I have been the last week....Keep in mind this pic hasn't been edited in anyway...it was just that beautiful!!  Recap posts to come soon!